
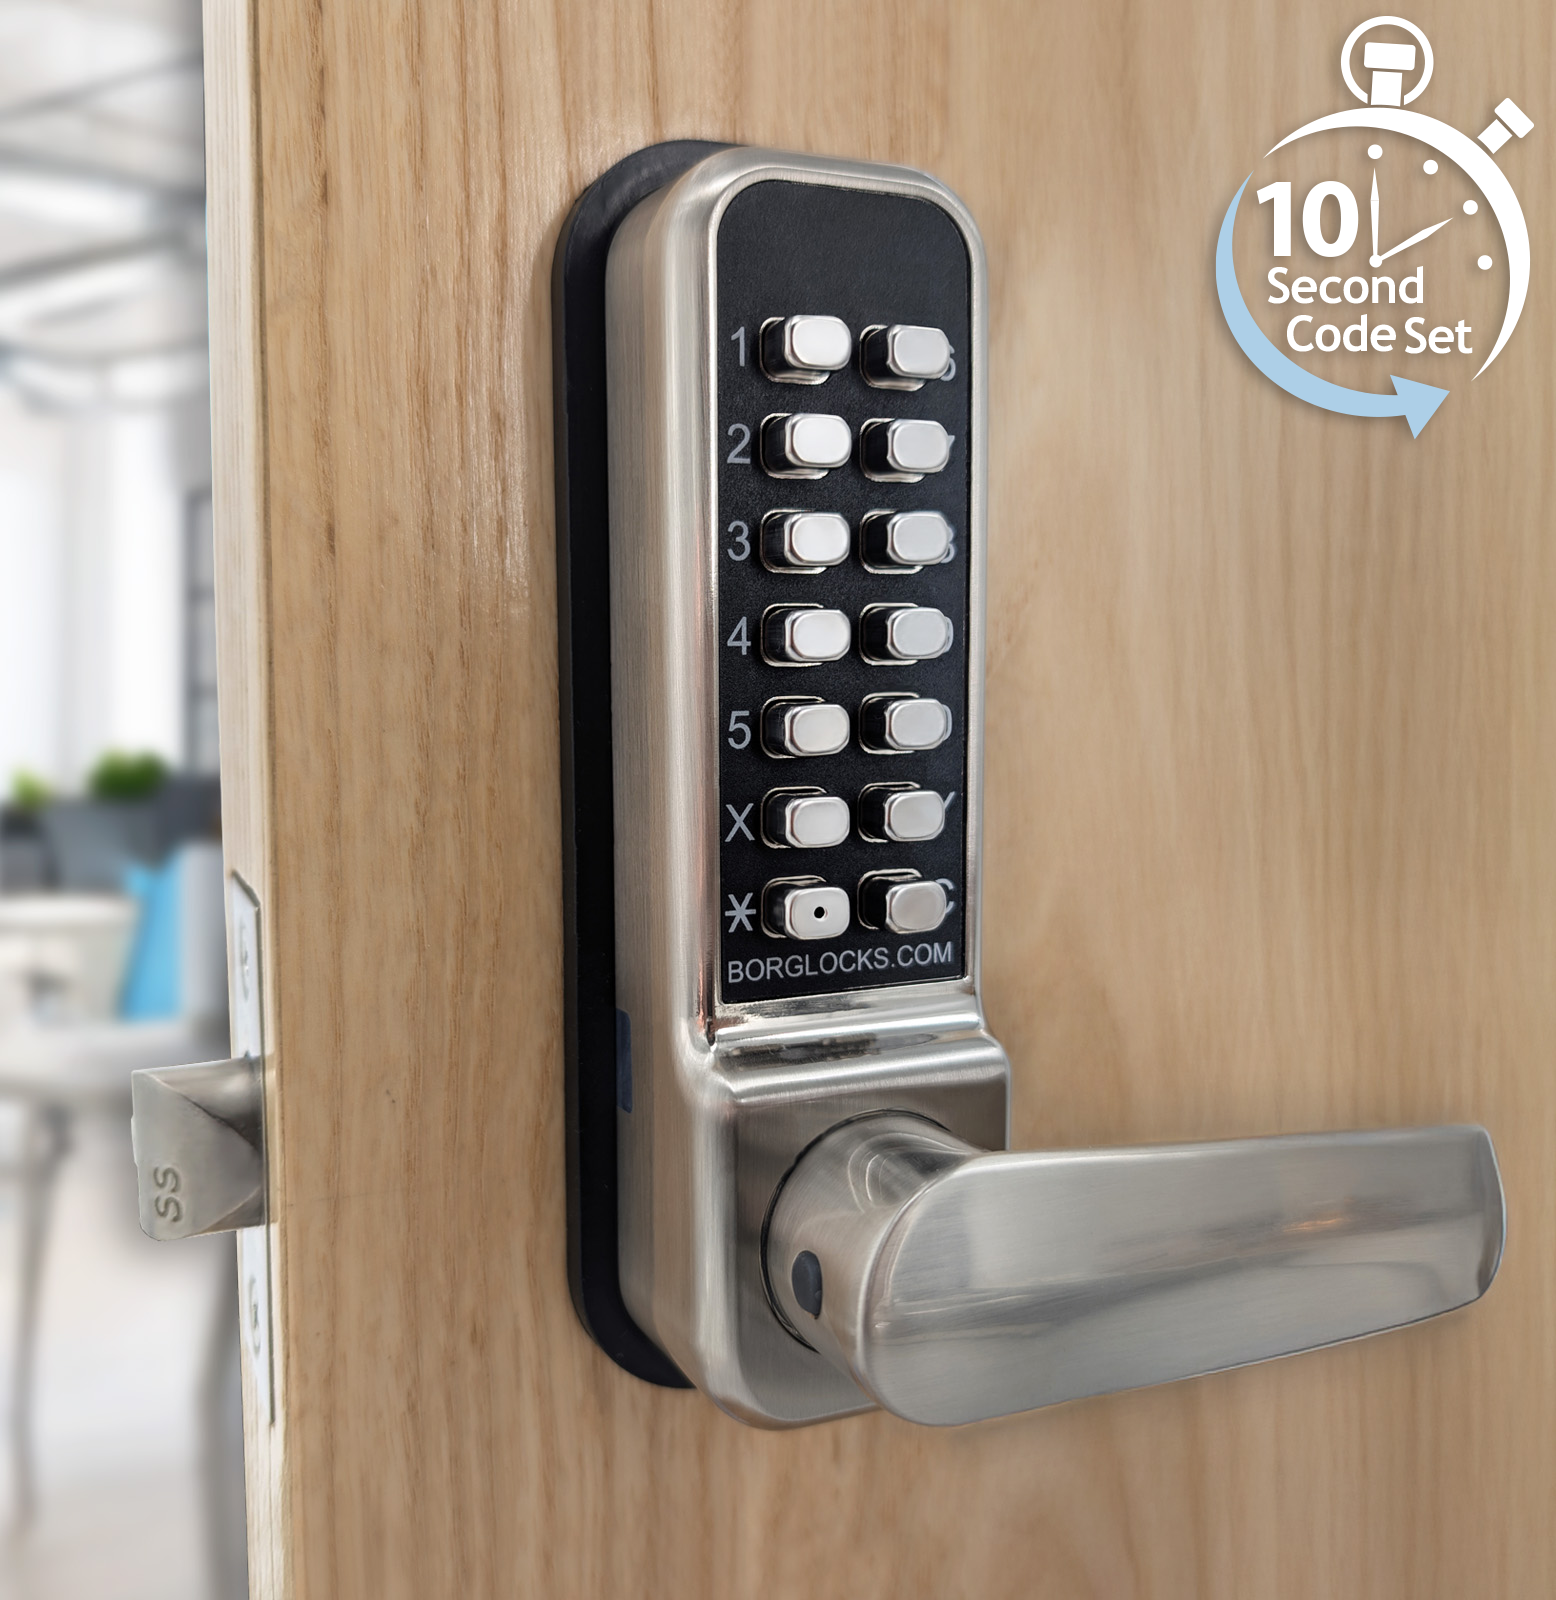
This can happen under three main circumstances:
If this has occurred soon after a code change, contact us, as this will suggest an issue with the spring control bar.
If not, then carry out a full service by removing the unit from the door and spraying a generous amount of a silicone or PTFE based lubricant into the slots on the back of the unit. Press each button several times and let it sit for 15-20 minutes.
Providing that the unit isn’t just in a holdback mode, determined by the inside handle starting in a horizontal position, then this can happen through three distinct ways:
In order to determine which, start with the latch bolt in the stuck position. Start to loosen the screws off the inside handle; if it springs free at this point, then this is suggesting that the spindle is too long and it needs to be trimmed.
If not, remove the unit and the latch from the door; if it springs out at this point, then the issue is likely to due with the door itself compressing itself against the latch.
If it stays stuck in place independent of the door, then the latch is damaged and needs replacing.
It’s likely that the handle return spring has broken. This can happen through force or just wear on older units. This can be easily replaced using the following part:
Handle return spring
Unscrew the two screws located on the handle return spring cassette, remove the spring cassette from the back of the inside handle and insert the new one in position.
If you have access to both sides of the door, then this can easily be resolved by removing the unit from the door. Just unscrew the two screws on the inside handle, to allow both halves to be removed from the door.
On the back of the unit will be two columns of holes, each with a coloured tumbler pins located within; some will be red and some will be blue. Your code will be the red tumblers.
If you don’t have access to each side of the door, then either your need to find another way through or call a locksmith. There is no master code or default that can be provided.
This normally indicates a degree of disconnect from the keypad to the latch. Either the spindle is too short and, as the door has opened and slammed shut, has slipped out of place or alternatively the latch itself is damaged.
If you can get access to the other side of the door, remove this from the door. Check the spindle and see if it’s twisted or bent. If it isn’t, check the length of the spindle matches the recommended sizes for your unit found in your instructions. If it falls within the acceptable range, then it may imply the latch is damaged and needs replacing.
This can happen under three main circumstances:
Carry out a full service by removing the unit from the door and spraying a generous amount of a silicone or PTFE based lubricant into the slots on the back of the unit. Press each button several times and let it sit for 15-20 minutes.
If this doesn’t work, then it may suggest that force has been applied to the chamber. Call us for next steps.
It’s most likely that a code change has occurred but either a step has been missed or a button hasn’t been properly pressed. You’re just going to need to find out what the code is currently set to.
The most common issue is the overlapping of the old code and the new code together. Press the C button and enter the old code. Without pressing the C button again, enter the new code. Try the handle. If it works, then the current code is a combination of the old and new.
If not, press the C button and try the handle. If it works, then you just don’t have a code set.
If neither works, remove the unit from the door. Press the C button and look at the back of the keypad. Some of the dials should be red and some of the will be blue. Make a note of whichever dial is red by default; these’ll be the buttons currently in the code.
Providing that the unit isn’t just in a holdback mode, determined by the inside handle starting in a horizontal position, then this can happen through three distinct ways:
In order to determine which, start with the latch bolt in the stuck position. Start to loosen the screws off the inside handle; if it springs free at this point, then this is suggesting that the spindle is too long and it needs to be trimmed.
If not, remove the unit and the latch from the door; if it springs out at this point, then the issue is likely to due with the door itself compressing itself against the latch.
If it stays stuck in place independent of the door, then the latch is damaged and needs replacing.
It’s likely that the handle return spring has broken. This can happen through force or just wear on older units. This can be easily replaced using the following part:
Handle return spring
Unscrew the two screws located on the handle return spring cassette, remove the spring cassette from the back of the inside handle and insert the new one in position.
If you have access to both sides of the door, then this can easily be resolved by removing the unit from the door. Just unscrew the two screws on the inside handle, to allow both halves to be removed from the door.
On the back of the unit will be two columns of coloured dials; some will be red and some will be blue. Press the C button. Your code will be the red dials.
If you don’t have access to each side of the door, then either your need to find another way through or call a locksmith. There is no master code or default that can be provided.
The spindle is too short for the setup. It’s been cut too short and is not engaging against the correct part. The spindle needs to be replaced.
This can happen under three main circumstances:
Carry out a full service by removing the unit from the door and spraying a generous amount of a silicone or PTFE based lubricant into the slots on the back of the unit. Press each button several times and let it sit for 15-20 minutes.
If this doesn’t work, then it may suggest that force has been applied to the chamber. Call us for next steps.
It’s most likely that a code change has occurred but either a step has been missed or a button hasn’t been properly pressed. You’re just going to need to find out what the code is currently set to.
The most common issue is the overlapping of the old code and the new code together. Press the C button and enter the old code. Without pressing the C button again, enter the new code. Try the handle. If it works, then the current code is a combination of the old and new.
If not, press the C button and try the handle. If it works, then you just don’t have a code set.
If neither works, remove the unit from the door. Press the C button and look at the back of the keypad. Some of the dials should be red and some of the will be blue. Make a note of whichever dial is red by default; these’ll be the buttons currently in the code.
Providing that the unit isn’t just in a holdback mode, determined by the inside handle starting in a horizontal position, then this can happen through three distinct ways:
In order to determine which, start with the latch bolt in the stuck position. Start to loosen the screws off the inside handle; if it springs free at this point, then this is suggesting that the spindle is too long and it needs to be trimmed.
If not, remove the unit and the latch from the door; if it springs out at this point, then the issue is likely to due with the door itself compressing itself against the latch.
If it stays stuck in place independent of the door, then the latch is damaged and needs replacing.
It’s likely that the handle return spring has broken. This can happen through force or just wear on older units. This can be easily replaced using the following part:
Handle return spring
Unscrew the two screws located on the handle return spring cassette, remove the spring cassette from the back of the inside handle and insert the new one in position.
If you have access to both sides of the door, then this can easily be resolved by removing the unit from the door. Just unscrew the two screws on the inside handle, to allow both halves to be removed from the door.
On the back of the unit will be two columns of coloured dials; some will be red and some will be blue. Press the C button. Your code will be the red dials.
If you don’t have access to each side of the door, then either your need to find another way through or call a locksmith. There is no master code or default that can be provided.
This is normal for the lever handle ECP units. The handle will turn and engage but will not rotate the spindle until such a time that the correct code has been entered.
The spindle is the wrong way. The spindle should be angled upwards to the edge of the door and downwards towards the hinged side.
Remove the spindle and reangle it to point it in the opposite direction.
This can happen under three main circumstances:
Carry out a full service by removing the unit from the door and spraying a generous amount of a silicone or PTFE based lubricant into the slots on the back of the unit. Press each button several times and let it sit for 15-20 minutes.
If this doesn’t work, then it may suggest that force has been applied to the chamber. Call us for next steps.
It’s most likely that a code change has occurred but either a step has been missed or a button hasn’t been properly pressed. You’re just going to need to find out what the code is currently set to.
The most common issue is the overlapping of the old code and the new code together. Press the C button and enter the old code. Without pressing the C button again, enter the new code. Try the handle. If it works, then the current code is a combination of the old and new.
If not, press the C button and try the handle. If it works, then you just don’t have a code set.
If neither works, remove the unit from the door. Press the C button and look at the back of the keypad. Some of the dials should be red and some of the will be blue. Make a note of whichever dial is red by default; these’ll be the buttons currently in the code.
Providing that the unit isn’t just in a holdback mode, determined by the inside handle starting in a horizontal position, then this can happen through three distinct ways:
In order to determine which, start with the latch bolt in the stuck position. Start to loosen the screws off the inside handle; if it springs free at this point, then this is suggesting that the spindle is too long and it needs to be trimmed.
If not, remove the unit and the latch from the door; if it springs out at this point, then the issue is likely to due with the door itself compressing itself against the latch.
If it stays stuck in place independent of the door, then the latch is damaged and needs replacing.
It’s likely that the handle return spring has broken. This can happen through force or just wear on older units. This can be easily replaced using the following part:
Handle return spring
Unscrew the two screws located on the handle return spring cassette, remove the spring cassette from the back of the inside handle and insert the new one in position.
If you have access to both sides of the door, then this can easily be resolved by removing the unit from the door. Just unscrew the two screws on the inside handle, to allow both halves to be removed from the door.
On the back of the unit will be two columns of coloured dials; some will be red and some will be blue. Press the C button. Your code will be the red dials.
If you don’t have access to each side of the door, then either your need to find another way through or call a locksmith. There is no master code or default that can be provided.
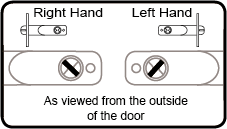
The handing of the unit is incorrect.
On the back of the keypad will be a handing plate found over the spindle follower. If you remove this plate, there will be a handing disk with either “R” or “L” in the 6 0’clock position with a pin locking it in place. Remove this pin and rotate the disk so the opposite letter is at the 6 o’clock position. Reinsert the pin to lock it in place.
Instructions for this can be found at the below link:
It’s possible that the handle return spring has jumped free from the casing. This isn’t a common issue but can occur if the coding chamber is loose when the handing is attempted, giving the chance for the return spring to skip the casing. This spring would have to be reset which requires dismantling. We’d advise you to call us for assistance and the unit may need to be returned.
This can happen under three main circumstances:
Carry out a full service by removing the unit from the door and spraying a generous amount of a silicone or PTFE based lubricant into the slots on the back of the unit. Press each button several times and let it sit for 15-20 minutes.
If this doesn’t work, then it may suggest that force has been applied to the chamber. Call us for next steps.
If you have access to both sides of the gate, then this can easily be resolved by removing the unit from the locking assembly. For the BL3030 ECP, this can be done by unscrewing the screws located above and below the internal keypad as well as the coding shroud. For the BL3080 ECP, this is done by removing the screws above the push pad and one located in the push pad mechanism itself.
On the back of the unit will be two columns of coloured dials; some will be red and some will be blue. Press the C button. Your code will be the red dials.
If you don’t have access to each side of the gate, then either your need to find another way through or call a locksmith. There is no master code or default that can be provided.
This could happen under a few different conditions:
It’s most likely that a code change has occurred but either a step has been missed or a button hasn’t been properly pressed. You’re just going to need to find out what the code is currently set to.
The most common issue is the overlapping of the old code and the new code together. Press the C button and enter the old code. Without pressing the C button again, enter the new code. Try the handle. If it works, then the current code is a combination of the old and new.
If not, press the C button and try the handle. If it works, then you just don’t have a code set.
If neither works, remove the unit from the door. Press the C button and look at the back of the keypad. Some of the dials should be red and some of the will be blue. Make a note of whichever dial is red by default; these’ll be the buttons currently in the code.
This can happen under three main circumstances:
Carry out a full service by removing the unit from the door and spraying a generous amount of a silicone or PTFE based lubricant into the slots on the back of the unit. Press each button several times and let it sit for 15-20 minutes.
If this doesn’t work, then it may suggest that force has been applied to the chamber. Call us for next steps.
If you have access to both sides of the gate, then this can easily be resolved by removing the unit from the locking assembly. For the BL3030 ECP, this can be done by unscrewing the screws located above and below the internal keypad as well as the coding shroud. For the BL3080 ECP, this is done by removing the screws above the push pad and one located in the push pad mechanism itself.
On the back of the unit will be two columns of coloured dials; some will be red and some will be blue. Press the C button. Your code will be the red dials.
If you don’t have access to each side of the gate, then either your need to find another way through or call a locksmith. There is no master code or default that can be provided.
This could happen under a few different conditions:
It’s most likely that a code change has occurred but either a step has been missed or a button hasn’t been properly pressed. You’re just going to need to find out what the code is currently set to.
The most common issue is the overlapping of the old code and the new code together. Press the C button and enter the old code. Without pressing the C button again, enter the new code. Try the handle. If it works, then the current code is a combination of the old and new.
If not, press the C button and try the handle. If it works, then you just don’t have a code set.
If neither works, remove the unit from the door. Press the C button and look at the back of the keypad. Some of the dials should be red and some of the will be blue. Make a note of whichever dial is red by default; these’ll be the buttons currently in the code.
It’s likely that the handle return spring has broken. This can happen through force or just wear on older units. This can be easily replaced using the following part:
Handle return spring
Unscrew the two screws located on the handle return spring cassette, remove the spring cassette from the back of the inside handle and insert the new one in position.
This can happen under three main circumstances:
Carry out a full service by removing the unit from the door and spraying a generous amount of a silicone or PTFE based lubricant into the slots on the back of the unit. Press each button several times and let it sit for 15-20 minutes.
If this doesn’t work, then it may suggest that force has been applied to the chamber. Call us for next steps.
It’s most likely that a code change has occurred but either a step has been missed or a button hasn’t been properly pressed. You’re just going to need to find out what the code is currently set to.
The most common issue is the overlapping of the old code and the new code together. Press the C button and enter the old code. Without pressing the C button again, enter the new code. Try the handle. If it works, then the current code is a combination of the old and new.
If not, press the C button and try the handle. If it works, then you just don’t have a code set.
If neither works, remove the unit from the gate. Press the C button and look at the back of the keypad. Some of the dials should be red and some of the will be blue. Make a note of whichever dial is red by default; these’ll be the buttons currently in the code.
It’s likely that the handle return spring has broken. This can happen through force or just wear on older units. This can be easily replaced using the following part:
Handle return spring
Unscrew the two screws located on the handle return spring cassette, remove the spring cassette from the back of the inside handle and insert the new one in position.
If you have access to both sides of the gate, then this can easily be resolved by removing the unit from the gate. Just unscrew the two screws on the inside handle, to allow both halves to be removed from the gate.
On the back of the unit will be two columns of coloured dials; some will be red and some will be blue. Press the C button. Your code will be the red dials.
If you don’t have access to each side of the gate, then either your need to find another way through or call a locksmith. There is no master code or default that can be provided.
This is normal for the lever handle ECP units. The handle will turn and engage but will not rotate the spindle until such a time that the correct code has been entered.
This could happen under a few different conditions:
This can happen under three main circumstances:
If this has occurred soon after a code change, contact us, as this will suggest an issue with the spring control bar.
If not, then carry out a full service by removing the unit from the door and spraying a generous amount of a silicone or PTFE based lubricant into the slots on the back of the unit. Press each button several times and let it sit for 15-20 minutes.
Providing that the unit isn’t just in a holdback mode, determined by the inside handle starting in a horizontal position, then this can happen through three distinct ways:
In order to determine which, start with the latch bolt in the stuck position. Start to loosen the screws off the inside handle; if it springs free at this point, then this is suggesting that the spindle is too long and it needs to be trimmed.
If not, remove the unit and the latch from the door; if it springs out at this point, then the issue is likely to due with the door itself compressing itself against the latch.
If it stays stuck in place independent of the door, then the latch is damaged and needs replacing.
It’s likely that the handle return spring has broken. This can happen through force or just wear on older units. This can be easily replaced using the following part:
Handle return spring
Unscrew the two screws located on the handle return spring cassette, remove the spring cassette from the back of the inside handle and insert the new one in position.
If you have access to both sides of the door, then this can easily be resolved by removing the unit from the door. Just unscrew the two screws on the inside handle, to allow both halves to be removed from the door.
On the back of the unit will be two columns of coloured dials; some will be red and some will be blue. Press the C button. Your code will be the red dials.
If you don’t have access to each side of the door, then either your need to find another way through or call a locksmith. There is no master code or default that can be provided.
This is normal for the lever handle units. The handle will turn and engage but will not rotate the spindle until such a time that the correct code has been entered.
The spindle is the wrong way. The spindle should be angled upwards to the edge of the door and downwards towards the hinged side.
Remove the spindle and reangle it to point it in the opposite direction.

This can happen under three main circumstances:
Carry out a full service by removing the unit from the door and spraying a generous amount of a silicone or PTFE based lubricant into the slots on the back of the unit. Press each button several times and let it sit for 15-20 minutes.
If this doesn’t work, then it may suggest that force has been applied to the chamber. Call us for next steps.
It’s most likely that a code change has occurred but either a step has been missed or a button hasn’t been properly pressed. You’re just going to need to find out what the code is currently set to.
The most common issue is the overlapping of the old code and the new code together. Press the C button and enter the old code. Without pressing the C button again, enter the new code. Try the handle. If it works, then the current code is a combination of the old and new.
If not, press the C button and try the handle. If it works, then you just don’t have a code set.
If neither works, remove the unit from the door. Press the C button and look at the back of the keypad. Some of the dials should be red and some of the will be blue. Make a note of whichever dial is red by default; these’ll be the buttons currently in the code.
Providing that the unit isn’t just in a holdback mode, determined by the inside handle starting in a horizontal position, then this can happen through three distinct ways:
In order to determine which, start with the latch bolt in the stuck position. Start to loosen the screws off the inside handle; if it springs free at this point, then this is suggesting that the spindle is too long and it needs to be trimmed.
If not, remove the unit and the latch from the door; if it springs out at this point, then the issue is likely to due with the door itself compressing itself against the latch.
If it stays stuck in place independent of the door, then the latch is damaged and needs replacing.
It’s likely that the handle return spring has broken. This can happen through force or just wear on older units. This can be easily replaced using the following part:
Handle return spring
Unscrew the two screws located on the handle return spring cassette, remove the spring cassette from the back of the inside handle and insert the new one in position.
If you have access to both sides of the door, then this can easily be resolved by removing the unit from the door. Just unscrew the two screws on the inside handle, to allow both halves to be removed from the door.
On the back of the unit will be two columns of coloured dials; some will be red and some will be blue. Press the C button. Your code will be the red dials.
If you don’t have access to each side of the door, then either your need to find another way through or call a locksmith. There is no master code or default that can be provided.
This is normal for the lever handle ECP units. The handle will turn and engage but will not rotate the spindle until such a time that the correct code has been entered.
The slam latch bolt is held in place with a screw at the end of the unit. If this is removed, then the main latch bolt body should be removable.
If it’s not, then heat up the latch bolt gently with something like boiled water. If some of the adhesive used to help lock the latch bolt screw in position has flowed further than intended, this should help break this seal.
The spindle is the wrong way. The spindle should be angled upwards to the edge of the door and downwards towards the hinged side.
Remove the spindle and reangle it to point it in the opposite direction.
This can happen under three main circumstances:
Carry out a full service by removing the unit from the door and spraying a generous amount of a silicone or PTFE based lubricant into the slots on the back of the unit. Press each button several times and let it sit for 15-20 minutes.
If this doesn’t work, then it may suggest that force has been applied to the chamber. Call us for next steps.
It’s most likely that a code change has occurred but either a step has been missed or a button hasn’t been properly pressed. You’re just going to need to find out what the code is currently set to.
The most common issue is the overlapping of the old code and the new code together. Press the C button and enter the old code. Without pressing the C button again, enter the new code. Try the handle. If it works, then the current code is a combination of the old and new.
If not, press the C button and try the handle. If it works, then you just don’t have a code set.
If neither works, remove the unit from the door. Press the C button and look at the back of the keypad. Some of the dials should be red and some of the will be blue. Make a note of whichever dial is red by default; these’ll be the buttons currently in the code.
Providing that the unit isn’t just in a holdback mode, determined by the inside handle starting in a horizontal position, then this can happen through three distinct ways:
In order to determine which, start with the latch bolt in the stuck position. Start to loosen the screws off the inside handle; if it springs free at this point, then this is suggesting that the spindle is too long and it needs to be trimmed.
If not, remove the unit and the latch from the door; if it springs out at this point, then the issue is likely to due with the door itself compressing itself against the latch.
If it stays stuck in place independent of the door, then the latch is damaged and needs replacing.
It’s likely that the handle return spring has broken. This can happen through force or just wear on older units. This can be easily replaced using the following part:
Handle return spring
Unscrew the two screws located on the handle return spring cassette, remove the spring cassette from the back of the inside handle and insert the new one in position.
If you have access to both sides of the door, then this can easily be resolved by removing the unit from the door. Just unscrew the two screws on the inside handle, to allow both halves to be removed from the door.
On the back of the unit will be two columns of coloured dials; some will be red and some will be blue. Press the C button. Your code will be the red dials.
If you don’t have access to each side of the door, then either your need to find another way through or call a locksmith. There is no master code or default that can be provided.
The free passage mode is engaged. This is engaged by entering the code with the F button.
To deactivate it, press the F button and then the C button.
The spindle is probably the wrong way. The spindle should be angled upwards to the edge of the door and downwards towards the hinged side.
Remove the spindle and reangle it to point it in the opposite direction.
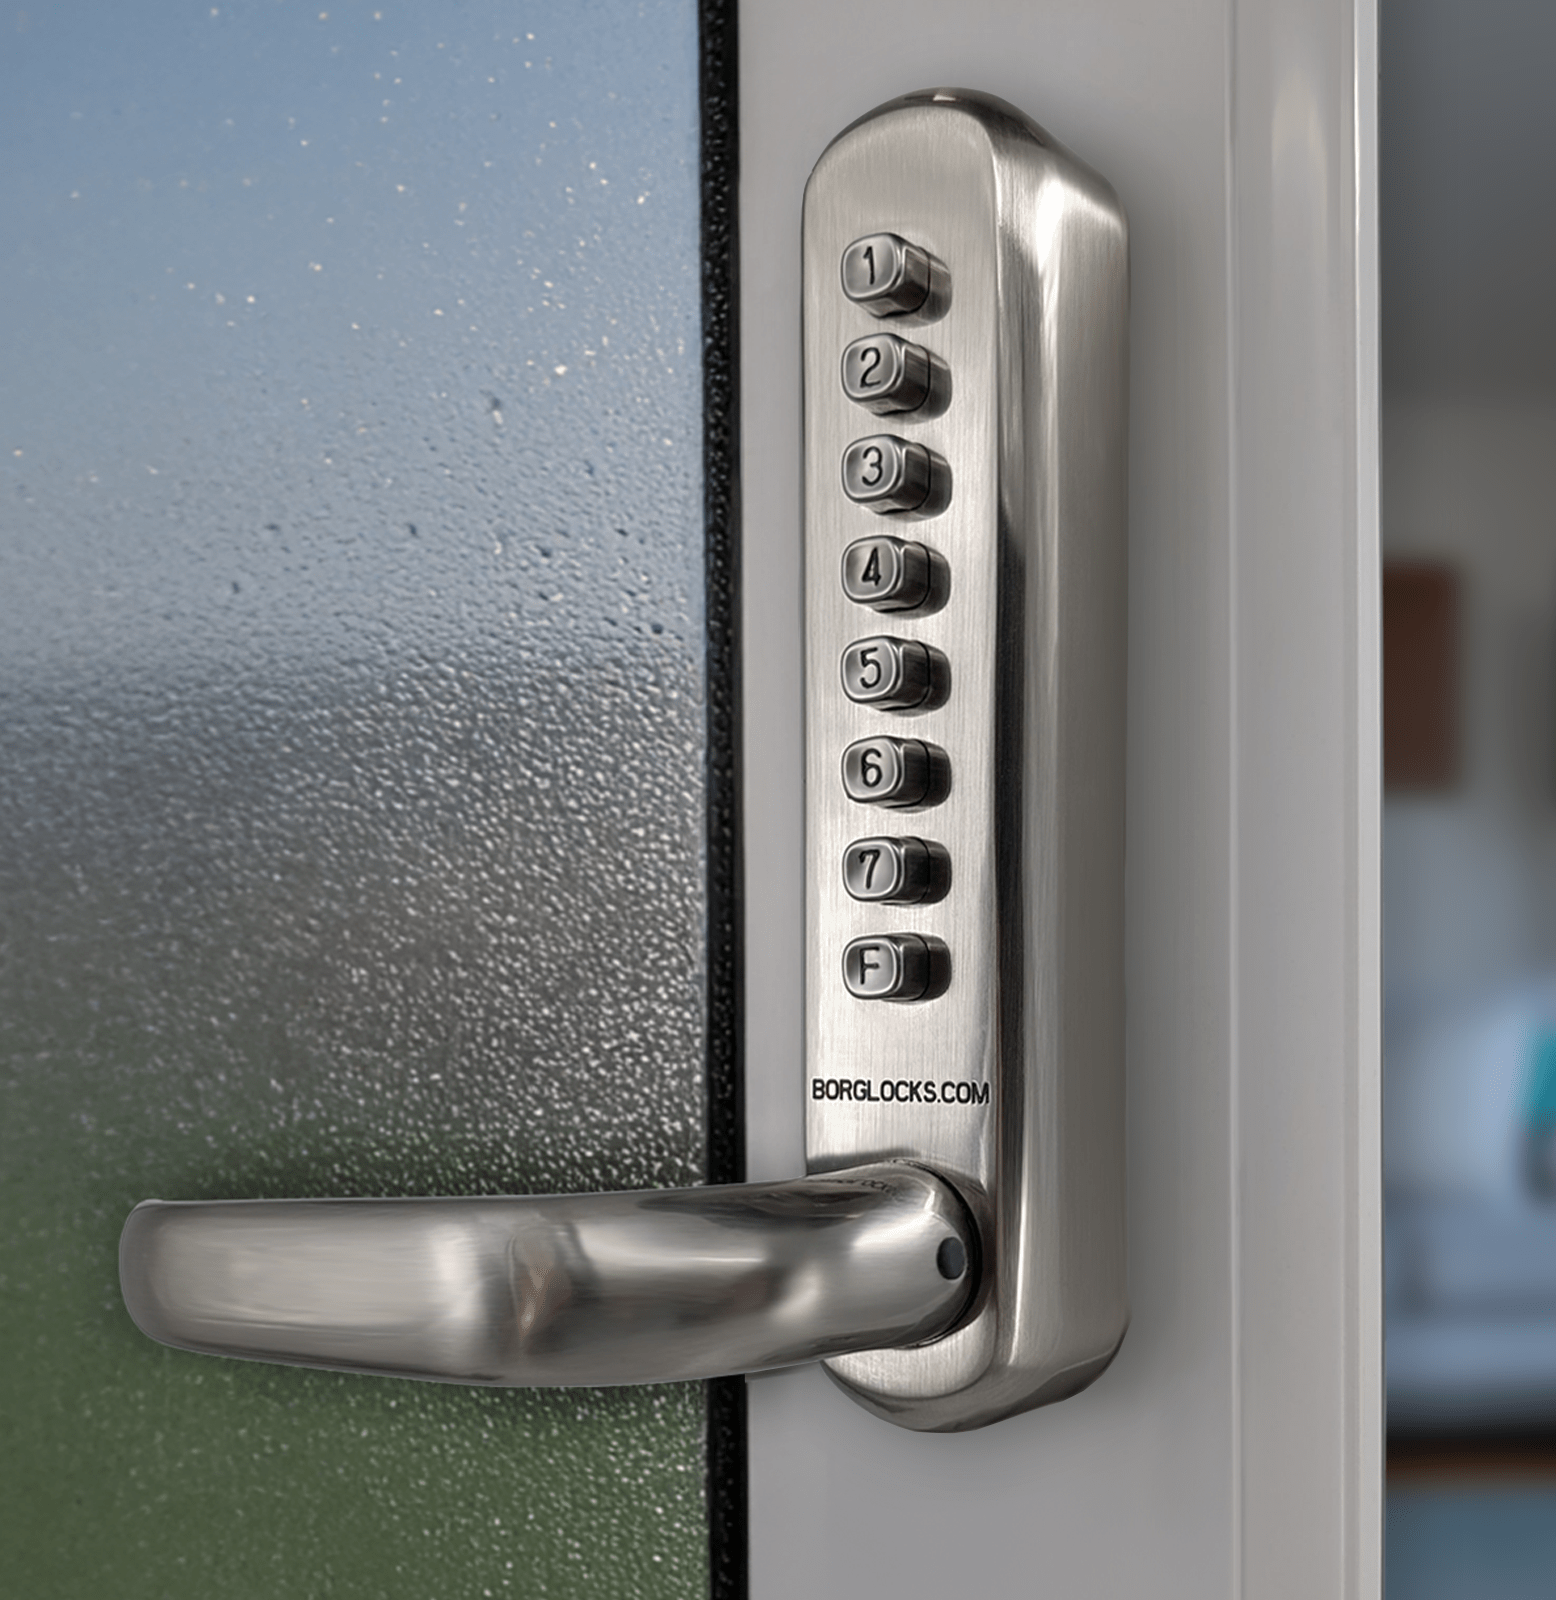
This can happen under three main circumstances:
Carry out a full service by removing the unit from the door and spraying a generous amount of a silicone or PTFE based lubricant into the slots on the back of the unit. Press each button several times and let it sit for 15-20 minutes.
If this doesn’t work, then it may suggest that force has been applied to the chamber. Call us for next steps.
It’s most likely that a code change has occurred but either a step has been missed or a button hasn’t been properly pressed. You’re just going to need to find out what the code is currently set to.
The most common issue is the overlapping of the old code and the new code together. Press the C button and enter the old code. Without pressing the C button again, enter the new code. Try the handle. If it works, then the current code is a combination of the old and new.
If not, press the C button and try the handle. If it works, then you just don’t have a code set.
If neither works, remove the unit from the door. Press the C button and look at the back of the keypad. Some of the dials should be red and some of the will be blue. Make a note of whichever dial is red by default; these’ll be the buttons currently in the code.
Providing that the unit isn’t just in a holdback mode, determined by the inside handle starting in a horizontal position, then this can happen through three distinct ways:
In order to determine which, start with the latch bolt in the stuck position. Start to loosen the screws off the inside handle; if it springs free at this point, then this is suggesting that the spindle is too long and it needs to be trimmed.
If not, remove the unit and the latch from the door; if it springs out at this point, then the issue is likely to due with the door itself compressing itself against the latch.
If it stays stuck in place independent of the door, then the latch is damaged and needs replacing.
It’s likely that the handle return spring has broken. This can happen through force or just wear on older units. This can be easily replaced using the following part:
Handle return spring
Insert the new one using the instructions found at the below link:
If you have access to both sides of the door, then this can easily be resolved by removing the unit from the door. Just unscrew the two screws on the inside handle, to allow both halves to be removed from the door.
On the back of the unit will be two columns of coloured dials; some will be red and some will be blue. Press the C button. Your code will be the red dials.
If you don’t have access to each side of the door, then either your need to find another way through or call a locksmith. There is no master code or default that can be provided.
The free passage mode is engaged. This is engaged by entering the code, turning the handle and then pressing the F button.
To deactivate it, rotate the handle downwards and, with the handle rotated, press the C button.
Failure to operate when fitted is typically an installation related issue.
The primary causes are typically spindle related. Spindle length plays an important part in this; too long and it’ll compress against the spindle follower and clutch, increasing the pressure on these parts and leading to the clutch slipping. The spindle should be the door thickness plus 18mm (so a 78mm long spindle on a 60mm thick door, for instance).
If not this, then the next is an alignment issue. If the two halves aren’t level, then this also can lead to the clutch slipping. Make sure the two halves are completely level.
Adjust the grub screw on the side of the handle and check to see if this resolves the handle rocking.
If it doesn’t, then check the rotation of the handle. There should be a rotation of 90 degrees in either direction. Should this go past this point, then this may be an indicator that there is some damage to the handle holder and clutching system. It may need to be returned. Please contact us for assistance.
This means that the free passage mode has been enabled accidentally and not cleared properly.
Pressing the F button once without turning the handle just disables the free passage mode for a single cycle. The next time you enter the code, the unit will slip back into a free passage state.
To take it back out properly, press the F button once and then turn the handle. This will take it back out of this state properly.
If you have access to both sides of the door, then this can easily be resolved by removing the unit from the door. Just unscrew the two screws on the inside handle and, if it’s a BL6100, then the two screws on the inside plate to allow both halves to be removed from the door.
If it’s a BL6100, then you’d also need to remove the plate at this time.
On the back of the unit will be a column of coloured dials. There should be a potential of three different colours showing; green, red and blue. If a button is blue, then it’s not in the code. If it’s red, then it’s in the code once and if it’s green then it’s in the code twice.
If you don’t have access to each side of the door, then either your need to find another way through or call a locksmith. There is no master code or default that can be provided.
When fitting, make sure the spindle follower is in the correct position. This is the circular portion with the square cut-out found towards the bottom of the keypad. The dot on the spindle follower should be at the 12 o’clock position. If it’s out of this position, rotate it back into the correct position.
If it is in place, then check that the dials are properly rotating. When a button is pressed, the dial on the back should move around and click to the next colour; from green to red to blue.
If this isn’t happening, then the coding chamber isn’t holding. Start by spraying a generous amount of a silicone or PTFE based lubrication around each dial. Press each button several times to work it through and let it sit for 20 minutes. It may need a firm tap against the base on the unit to reset if it still doesn’t start to hold after this point.
The multipoint cassette may be locked with the key cylinder. Make sure it’s not deadlocked and then reattempt it.
If this is still failing with the correct code entered and is still solid, then the handle is either too tightly fit onto the keypad or there is some damage to the clutching system.
This can happen under three main circumstances:
Carry out a full service by removing the unit from the door and spraying a generous amount of a silicone or PTFE based lubricant into the slots on the back of the unit. Press each button several times and let it sit for 15-20 minutes.
If this doesn’t work, then it may suggest that force has been applied to the chamber. Call us for next steps.
It’s most likely that a code change has occurred but either a step has been missed or a button hasn’t been properly pressed. You’re just going to need to find out what the code is currently set to.
The most common issue is the overlapping of the old code and the new code together. Press the C button and enter the old code. Without pressing the C button again, enter the new code. Try the handle. If it works, then the current code is a combination of the old and new.
If not, press the C button and try the handle. If it works, then you just don’t have a code set.
If neither works, remove the unit from the door. Press the C button and look at the back of the keypad. Some of the dials should be red and some of the will be blue. Make a note of whichever dial is red by default; these’ll be the buttons currently in the code.
If you have access to both sides of the door, then this can easily be resolved by removing the unit from the door. Just unscrew the two screws on the inside handle, to allow both halves to be removed from the door.
On the back of the unit will be two columns of coloured dials; some will be red and some will be blue. Press the C button. Your code will be the red dials.
If you don’t have access to each side of the door, then either your need to find another way through or call a locksmith. There is no master code or default that can be provided.
The free passage mode is engaged. This is engaged by entering the code, turning the handle and then pressing the F button.
To deactivate it, rotate the handle downwards and, with the handle rotated, press the C button.
This can happen under three main circumstances:
Carry out a full service by removing the unit from the door and spraying a generous amount of a silicone or PTFE based lubricant into the slots on the back of the unit. Press each button several times and let it sit for 15-20 minutes.
If this doesn’t work, then it may suggest that force has been applied to the chamber. Call us for next steps.
It’s most likely that a code change has occurred but either a step has been missed or a button hasn’t been properly pressed. You’re just going to need to find out what the code is currently set to.
The most common issue is the overlapping of the old code and the new code together. Press the C button and enter the old code. Without pressing the C button again, enter the new code. Try the handle. If it works, then the current code is a combination of the old and new.
If not, press the C button and try the handle. If it works, then you just don’t have a code set.
If neither works, remove the unit from the door. Press the C button and look at the back of the keypad. Some of the dials should be red and some of the will be blue. Make a note of whichever dial is red by default; these’ll be the buttons currently in the code.
If you have access to both sides of the door, then this can easily be resolved by removing the unit from the door. Just unscrew the two screws on the inside handle, to allow both halves to be removed from the door.
On the back of the unit will be two columns of coloured dials; some will be red and some will be blue. Press the C button. Your code will be the red dials.
If you don’t have access to each side of the door, then either your need to find another way through or call a locksmith. There is no master code or default that can be provided.
The free passage mode is engaged. This is engaged by entering the code, turning the handle and then pressing the F button.
To deactivate it, rotate the handle downwards and, with the handle rotated, press the C button.
Due to how heavy duty the coding chamber is, the buttons can sometimes feel a little heavier at the start of its’ life. This will work its way looser over time, as parts start to break in.
However, if this is proving difficult, then apply a silicone or PTFE lubricant around each button and try to press it a few times to help work it through. This should help reduce some of this weight.
Contact Us! We're open Mon-Fri, 08:30 to 17:30